They tell you things like “choose your builder” and “get approvals” — which is technically correct and practically useless, because anyone who is building a home already knows those things need to happen. What they do not tell you is what to actually check at each stage, what gets missed by the people who end up with problems, or what the specific things are that experienced homeowners wish they had paid more attention to before they were past the point where it was easy to fix.
This is an attempt at a more honest version. The kind of checklist that reflects what actually matters at each stage of a home build in Australia — not just a list of stages, but the specific things within each stage that make the difference between a build that goes well and one that creates ongoing stress.
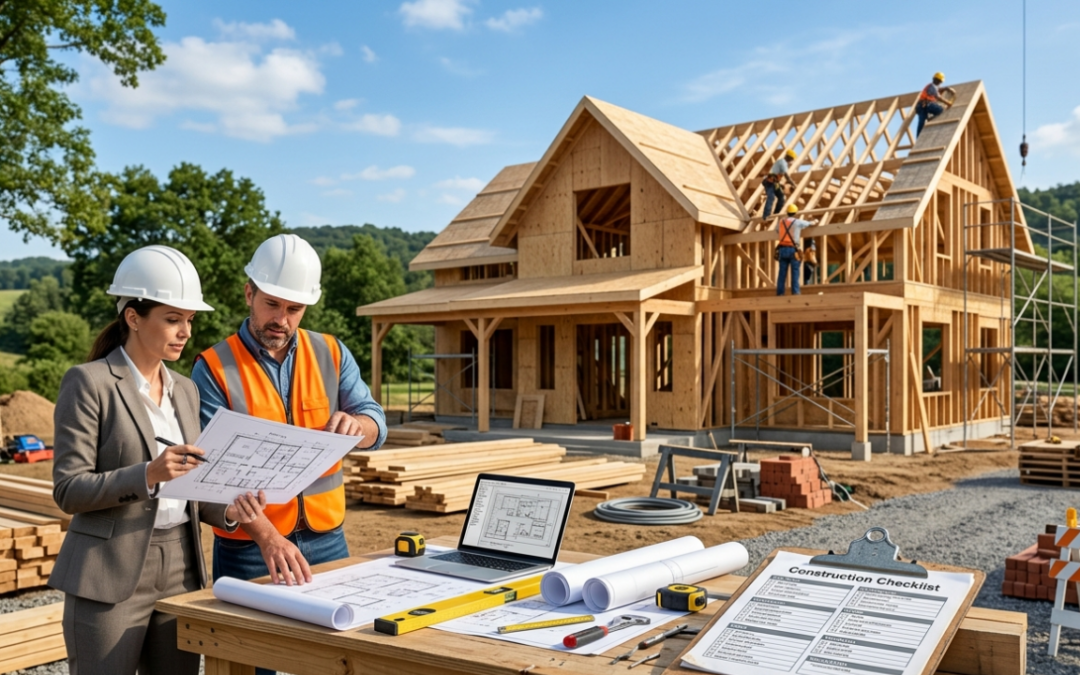
Whether you are building with Granton Homes or working with another builder, these are the things worth checking and confirming as you move through the process.
Before You Talk to Anyone — The Preparation That Shapes Everything
Most people rush this stage because they are eager to get into the exciting parts of the process. The people who have the best building experiences almost universally say they wish they had spent more time here.
The things worth confirming before you start any builder conversations are more specific than most people address.
Do you have a genuine understanding of your financial position — not just your maximum borrowing capacity, but what you are actually comfortable committing to given your other financial priorities and the reality that builds almost always cost more than the initial estimate? Have you spoken to a mortgage broker or bank about construction finance specifically, since it works differently from standard home loans and the details matter?
Do you have a clear picture of what you need the home to do — not just how many bedrooms and bathrooms, but how your household actually lives and what the design needs to reflect? Have you identified what frustrates you about where you live now and made sure those frustrations are informing what you are asking for in the new home?
Have you thought about location specifically — not just the general area, but the specific considerations of proximity to work and schools, the trajectory of the suburb, the planning environment that will govern what can be built, and whether the blocks you are considering have characteristics that will affect costs?
These are not quick questions. Taking a week or two to think through them properly before any external conversations begin is time well spent. Going into builder conversations with clarity about what you need and what you can afford puts you in a much stronger position than going in with vague ideas and hoping the process will clarify them.
Budget — The Honest Version
What to confirm before signing anything:
Have you built a budget around the real total cost rather than the base construction price? The real total needs to include land if you have not already bought it, site preparation costs based on an actual site assessment rather than a guess, design and documentation fees, approval costs for whichever pathway your project goes through, utility connections, landscaping and driveway and fencing, window furnishings, and a realistic estimate of the upgrades you will make during the selections process.
Have you confirmed this total with your lender and established that your borrowing capacity and your savings together cover it — with room to spare rather than right at the limit?
Have you set aside a genuine contingency — ten to fifteen percent of your total expected cost — that is treated as already allocated rather than as money available for upgrades if the budget runs tight?
Do you understand the difference between what Granton Homes’ base price includes and what will be in addition? Have you asked specifically what the most common upgrades are and what they typically cost, so you can anticipate the selections process impact on your budget before you are in the middle of it?
Things people miss:
The gap between the selections process estimate and the final upgrade cost. When you are making individual selections, each one seems manageable. The total accumulates faster than people expect. Tracking the running total as you go rather than at the end is how you stay in control.
The cost of decisions made after the contract is signed. Variations — changes to the agreed scope once construction has started — cost money in ways that are consistently underestimated. The discipline to make decisions properly during the design and selections phase rather than during construction is one of the most financially significant habits of homeowners who finish on budget.
Choosing Your Builder — What to Actually Check
The basics that non-negotiably need to happen:
Verify the builder’s licence through the relevant state authority. In NSW, this is NSW Fair Trading. It takes five minutes online. It confirms the builder is currently licensed, shows the licence category, and shows any complaints or disciplinary actions. This is not an optional step regardless of how professional the builder appears or how many display homes they have.
Confirm insurance. Ask specifically for evidence of Home Building Compensation Fund insurance for your project. This is the insurance that protects you if the builder becomes insolvent or fails to complete the work. Without it, you have no protection if the worst happens.
The things that tell you whether the relationship will work:
Visit a completed home they have built — not a display home, but a home a client is living in — and assess the quality of the finishing in the real-world conditions that display homes are designed to obscure. Look at the grout lines, the paint finish, the quality of the joinery, the way materials meet at edges and transitions.
Speak to past clients directly. Ask not just whether they are happy with the finished home but whether the process itself was well managed. Were they kept informed throughout? Were problems handled transparently? Were they surprised by costs that were not clear from the outset? Would they build with the same builder again?
Pay attention to how the builder’s team communicates with you during the early conversations before you have committed to anything. A team that listens carefully, explains things clearly, and does not rush you towards signing is showing you something about how the relationship will feel for the duration of the build. Granton Homes builds their client relationships on exactly this kind of communication — clear, transparent, and genuinely oriented towards the client’s needs rather than just closing the sale.
Design and Floor Plan — The Decisions With the Longest Consequences
What to confirm before approving any floor plan:
Has the orientation of the home on the block been specifically considered? Does the floor plan take advantage of the block’s solar aspect — north-facing living areas, morning light in the master bedroom, manageable solar gain on the west elevation? Or was the layout determined by other considerations that put the living areas in a less favourable position?
Have you walked through the floor plan mentally as a lived experience — not as an abstract layout, but as a sequence of movements through a real day? Does the morning routine make sense spatially? Is the kitchen positioned well relative to the dining area and the outdoor entertaining space? Are the bedrooms acoustically separated from the noisier parts of the house?
Is there a place for everything that needs a place? Go through every category of storage specifically — clothing, food, cleaning products, tools and equipment, seasonal items, bedding and towels, sporting equipment, children’s belongings if applicable — and confirm that the floor plan has specific, properly sized storage for each of these rather than just a general provision that seems adequate until it is not.
Does the home have flexibility built in — rooms that can serve different purposes as life changes, infrastructure provisions that do not close off options unnecessarily?
The specific things that get missed:
The position of windows and their relationship to where furniture will be. A window positioned where the sofa needs to go, or a bedroom window that faces directly into the neighbour’s window, are details that are hard to see on a floor plan and immediately obvious in the finished home.
Door swing directions and their conflicts. A bathroom door that swings into the vanity when fully opened. A bedroom door that swings into the bed position. These are the daily irritations that good planning prevents.
Power point and data point positions. Where will the television actually sit, and is there a power point there? Where will the desk be in the home office, and is the data point in a position that works for that? These are specified during the construction documentation phase and are cheap to get right, expensive to change after the fact.
Inclusions and Selections — Where the Budget Gets Away From People
What to confirm before the selections process starts:
What is actually in the base specification? Not what the display home shows — what the contract delivers without any upgrades. Ask your builder to show you base specification examples for the key selections so you have a real reference point.
What is the process for the selections stage? How many selection appointments are there? What needs to be decided by when? What happens if a decision is not made within the required timeframe? Understanding the structure of this process before you are inside it makes it considerably less stressful.
What is the variation policy? If you decide during or after selections that you want to change something, what is the process and what does it cost? Understanding this before you are facing a variation decision prevents surprises.
What to actually check during selections:
Are you tracking the running budget impact of your selections as you go rather than at the end? Each upgrade decision should be added to a running total that you review against your budget allocation for upgrades. If you are significantly over that allocation early in the selections process, you need to make trade-offs rather than continuing to add.
Are you making selections for how the home will live rather than for how it will look in a photograph? The kitchen backsplash that is dramatic in the display environment might be overwhelming in the more modest scale of your actual kitchen. The tile that is striking on a full bathroom wall might be difficult to live with as the dominant feature of the room you use every morning.
Are you being consistent across the home in terms of finish level? Upgrading heavily in the kitchen and bathroom and accepting base specification everywhere else creates a jarring inconsistency. Working out a consistent level of finish relative to your upgrade budget and applying it across the home produces a more coherent result.
Approvals — Managing Expectations Honestly
What to confirm at the start of this stage:
Which approval pathway is your project going through — a Complying Development Certificate with a private certifier, or a Development Application through council? What is the realistic timeline for each, and which does your specific project qualify for?
What documentation is required, and is your builder managing the preparation and submission of that documentation on your behalf?
What to actually watch during this stage:
Do not count on approvals coming through at the optimistic end of the timeline. A CDC through a private certifier might come through in four weeks; it might take eight. A DA through council might take six weeks; it might take four months. Planning your construction start date around the optimistic scenario and then having to adjust when the realistic scenario plays out is a source of frustration that is entirely avoidable.
If the approval comes back with conditions or requests for additional information or changes, understand those conditions before the documentation is amended and resubmitted. Sometimes approval conditions have implications for the design that are worth understanding clearly rather than just accepting and passing on.
Site Preparation — The Stage That Surprises People
What to confirm before construction starts:
Has a proper site assessment been done? Not a preliminary visual assessment, but an actual soil test that determines the soil classification and the appropriate foundation design for that specific site? The slab specification on your building contract should reflect the actual soil conditions of your specific block, not a generic assumption.
Are there any site characteristics — slope, drainage, access, vegetation, services location — that will affect either the cost or the timeline of site preparation, and has your budget accounted for them?
What to check during this stage:
Visit the site during preparation. The site assessment may have identified conditions that look different in reality than in the report — additional complexity, unexpected ground conditions, issues with access that were not fully apparent from a desktop assessment. Being present during the early site work means you see these things when they can be discussed and addressed rather than discovering their cost impact later.
Confirm that all required services — power, water, sewer, communications — have been notified and that connection processes are underway. Service connection lead times can affect the construction timeline if left too late.
Construction — Staying Involved Without Getting in the Way
What to establish at the start of construction:
Who is your primary point of contact during the build — the site supervisor or foreman who is responsible for day-to-day construction management? How do you get in touch with them when you have a question? How frequently will you receive formal progress updates?
What are the key milestone dates — slab pour, frame stage, lock-up, fixing stage completion, practical completion — and what do those dates mean for the payment schedule?
What to actually do during construction:
Visit the site regularly. Weekly during active construction is a reasonable baseline. More frequently if something significant is happening that day. The purpose is not to supervise or second-guess the trades — it is to stay connected to what is happening and to notice anything that looks wrong while it is still straightforward to address.
Respond promptly when your builder needs decisions or approvals from you. Client response delays are a genuine cause of construction delays. If you are unreachable when a decision is needed and work has to pause waiting for your answer, the schedule impact is yours as much as the builder’s.
Granton Homes maintains active communication with clients throughout the construction phase — regular updates, prompt responses to questions, transparency when something changes. Use that communication actively rather than passively. Ask what you need to ask. Raise what needs to be raised. A client who is engaged and communicative makes for a better build than one who is absent and hoping for the best.
The stages to pay specific attention to:
Before the slab is poured. Once the concrete goes down, nothing about the foundation can be changed without enormous cost and disruption. If an independent inspector is going to look at anything, this is the stage that justifies it most — confirming that the reinforcement, the waterproofing membrane, and the overall slab preparation meet the specification.
At frame stage. The frame defines the geometry of the home — where every wall, window, and door opening is. Walking through the framed structure with the floor plan in hand and confirming that the layout matches what you approved is worth the visit. Errors at frame stage are costly but manageable. Errors discovered after plastering are significantly more so.
During the fixing stage, when internal work is happening within the walls before they are closed. The positions of power points, data points, lighting circuits, plumbing rough-ins — these are all accessible and adjustable now. Once the walls are plastered, changing any of them requires opening up finished surfaces.
Inspections — Do Not Skip These
Independent building inspections should happen at minimum four times: pre-slab, frame stage, lock-up, and pre-handover. Each one involves a qualified inspector who is not connected to the build assessing the work against the relevant standards and the specification in your contract.
These inspections cost a few hundred dollars each. The potential cost of issues identified after handover, when the builder’s attention and legal obligation have moved on, is many times that.
What to do with the inspection report:
Read it properly. If anything is flagged, raise it with your builder immediately rather than setting the report aside to deal with later. Most issues identified during construction inspections are straightforward to address while the work is still in progress. The same issue after plastering or tiling may require destructive work to access.
Keep copies of all inspection reports in the same place as your contract, plans, and other build documentation. These records are your protection during the warranty period and may be relevant if you ever sell the property.
Practical Completion Inspection — The Walk-Through That Matters
What to do at the PCI:
Block out a proper amount of time. This is not a fifteen-minute formality — it is a thorough inspection of a finished home. Two hours is a reasonable minimum for a standard-size custom home.
Go through every room systematically. Every door — does it open and close properly, does it latch correctly, does the seal work? Every window — does it operate smoothly, does it lock, is the glazing free of scratches or chips? Every tap — does the water flow correctly, are there any drips? Every light switch and power point — do they work?
Look at every surface. The paint finish — are there runs, missed areas, patches where the colour does not quite match? The tile work — are the grout lines consistent, are there any cracked tiles, is the grout fully filled? The joinery — do the cabinet doors and drawers open and close smoothly, are the hinges properly adjusted, is the bench surface free of chips or gaps at the edges?
Write down everything that is not right. Every item, regardless of how minor it seems. A small paint patch that is slightly the wrong colour is worth noting. A cabinet hinge that needs adjustment is worth noting. A grout line that has not been properly filled is worth noting. These are your builder’s responsibility to address, and noting them now means they get addressed rather than persisting as ongoing reminders that the job was not quite finished.
What to confirm at handover:
All keys — front door, back door, any locks on windows or outbuildings — are provided. All appliance manuals and warranties are provided. All compliance certificates are provided. Utility connections are active. Final payment is settled and the appropriate receipts and certificates are issued.
The documents you receive at handover — occupancy certificate, compliance certificates, appliance warranties, any maintenance documentation — should be kept permanently and stored somewhere you will be able to find them.
After You Move In — The Period Most Checklists Ignore
In the first few weeks:
Live in the home before you conclude everything is fine. Use every system — the heating and cooling, the kitchen appliances, the shower in every bathroom, the laundry facilities. Some issues only become apparent under actual use conditions rather than the inspection conditions of handover day.
Note anything that appears to be a defect or an incomplete item and communicate it to your builder promptly. The statutory warranty period in NSW is two years for minor defects and six years for major structural defects, but prompt communication is better than letting things accumulate.
Ongoing:
Schedule a self-inspection at the three-month mark and again at the twelve-month mark. Walk through the home systematically looking for anything that has emerged with use and time — doors that have shifted and no longer latch properly, grout that has cracked in movement-prone areas, any signs of moisture in unexpected places. These are the normal settling and adjustment issues that occur in new homes and are the builder’s warranty responsibility if they arise within the applicable period.
Keep your documentation permanently. The build contract, the approved plans, any variation orders, your occupancy certificate, the inspection reports, the warranty certificates. These documents protect your legal rights during the warranty period and will matter again if you ever sell the property.
What the Checklist Is Actually For
A checklist does not build a home. It does not make decisions for you or solve problems before they arise. What it does is give you a framework for staying on top of a complex process that involves many stages and many decisions over an extended period.
The homeowners who have the smoothest building experiences are the ones who are consistently engaged and consistently informed — who know what stage they are at, what comes next, what decisions are due, and what to pay attention to. The checklist is how you maintain that awareness without having to hold the entire build in your head simultaneously.
Granton Homes provides a structured process that makes this engagement easier — clear communication, defined stages, proactive updates, and genuine guidance for clients who are going through the process. But the engagement itself has to come from you. The builder manages the build. You manage your involvement in it.
That combination — a builder who is organised, transparent, and communicative, and a client who is prepared, engaged, and informed — is what produces the builds that people look back on positively. Not just because the home is good, which it should be. But because the journey to get there was handled well.